Email Autoresponders in Webuzo are essential tools for maintaining communication with clients, team members, and others, even when you’re away. They’re often used for out-of-office messages, confirmations, or any other automatic responses you need to give. With Webuzo, setting up an autoresponder is simple. Let’s go through the process step by step, and by the end, you’ll have your autoresponder configured and ready to manage incoming emails automatically.
Table of Contents
Step 1: Log in to Webuzo
Start by logging into your Webuzo control panel. You can typically access Webuzo at yourdomain.com:2002 (replace yourdomain.com with your actual domain). Enter your username and password. Once logged in, you’ll see the main Webuzo dashboard, which displays a range of tools and services available for your website hosting, and email needs.

Step 2: Go to the Email Section
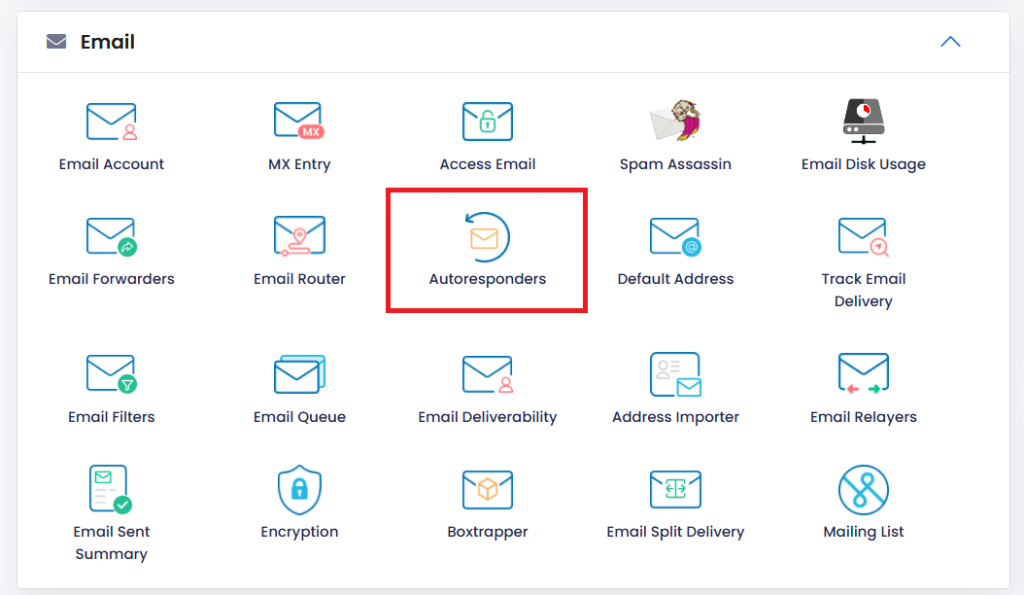
From the Webuzo dashboard, locate the Email section. This section is dedicated to managing email accounts, spam filters, forwarding, Email Autoresponders in Webuzo, and more. Click on Email Accounts to manage your email settings and view any existing email accounts you’ve already set up.

Step 3: Access Autoresponders
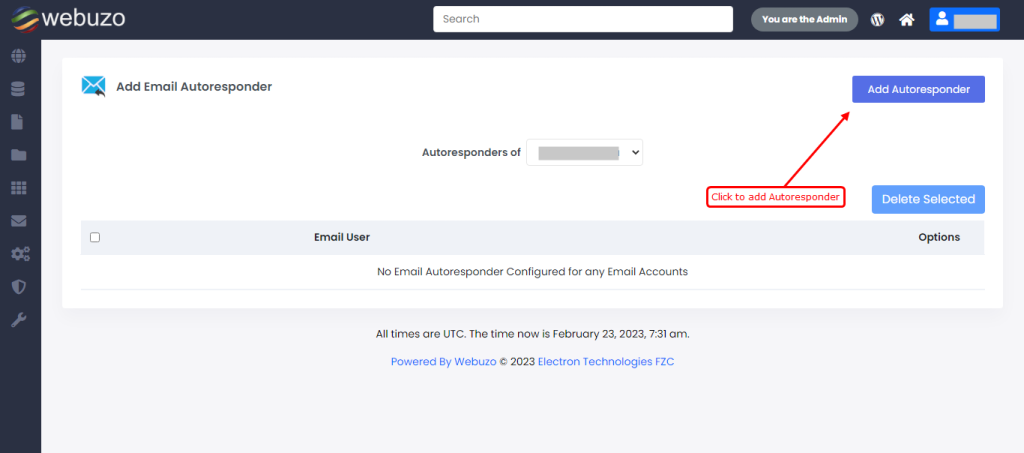
Inside the Email section, find and click on Email Autoresponders in Webuzo. This is where you’ll be able to view, create, edit, or delete autoresponder messages associated with your email accounts. Autoresponders can be set for any email address linked to your domain.

Step 4: Create a New Email Autoresponders in Webuzo
To set up a new autoresponder, click on Create Email Autoresponders in Webuzo. You’ll be prompted to choose the email account you wish to associate with the autoresponder. Select the appropriate email account from the list. If you haven’t created any email accounts in Webuzo yet, you’ll need to create one before proceeding. Here’s how:

- Go back to the Email Accounts section.
- Click Create Email Account and fill in the required details, such as the username and password.
- Once created, return to the autoresponder section.
Step 5: Configure Autoresponder Settings
Now you’re ready to set up the specifics of the Email Autoresponders in Webuzo. Here’s a breakdown of the fields you’ll need to complete:

- From: Select the email account that will send the autoresponder message. It’s essential to pick the right one, especially if you have multiple email accounts set up.
- Subject: Enter the subject line for the autoresponder. This will be the subject that recipients see in their inboxes when they receive your automatic reply. Examples include “Out of Office Notice,” “Thank You for Your Message,” or “We’ll Be Back Soon.”
- Body: This is where you write the main message of the autoresponder. Here, you can include any relevant information, such as the reason for your absence, when you’ll be available, alternative contacts, or any other message you want the sender to see. Remember to keep it clear and professional.

- Start and End Time: Setting a start and end time allows you to control when the autoresponder is active. This is especially useful for temporary out-of-office messages. The start time could be the date and time when you want the autoresponder to begin sending messages, and the end time determines when it should stop. If you’re setting up a permanent autoresponder, you might leave the end time blank.
Step 6: Save the Autoresponder
Once you’ve filled in all the details, double-check to make sure everything is correct, then click the Auto responder. Your autoresponder is now live!

Testing the Autoresponder (Optional but Recommended)
To make sure everything is working as expected, it’s a good idea to send a test email to the email account with the autoresponder. This allows you to see how the autoresponder message appears to the recipient and to verify that any timing or formatting is correct.
Managing and Editing Autoresponders
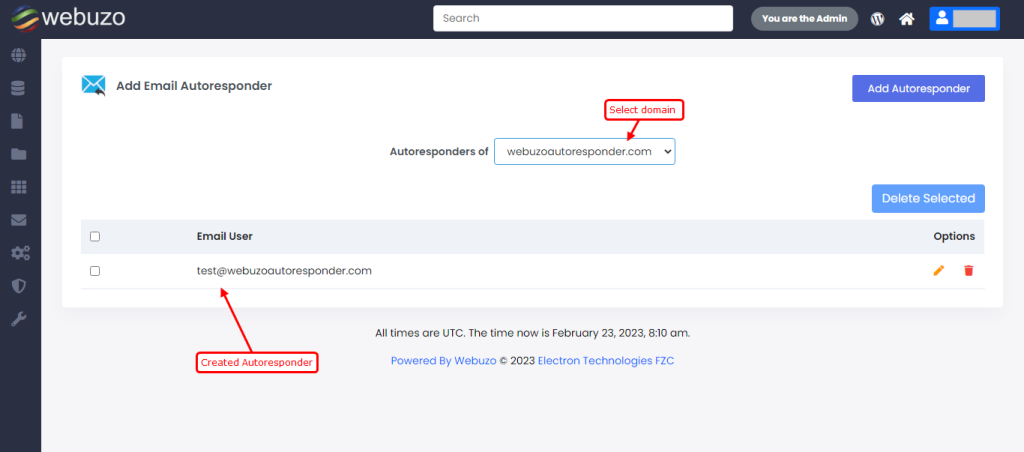
If you need to change the content, timing, or any other aspect of the autoresponder, return to the Email Autoresponders in Webuzo. Find the autoresponder you want to edit, make your changes, and save them. You can also delete the autoresponder if it’s no longer needed by selecting it and choosing the delete option.
Conclusion
Setting up an email autoresponder in Webuzo is straightforward, and it ensures that you don’t miss out on important communications when you’re unavailable. Whether you need a temporary out-of-office reply or a permanent acknowledgment message, Email Autoresponders in Webuzo are an excellent tool for keeping your email contacts informed. Just follow these steps, and you’ll have your autoresponder up and running in no time.
